When your boat comes out of the barn and spring prep begins, don’t forget to take a close look at your sails. Quantum’s Ike Bowen made this checklist to guide you through the process to help avoid surprises that could ruin a perfect day on the water.
Nothing ruins a beautiful upwind leg like a blown genny, especially if it could have been prevented. Early identification of minor problems or issues not only prevents costly repairs later on, but also gives you time to take corrective action before they become major issues and affect your ability to be competitive on the racecourse, or even race at all.
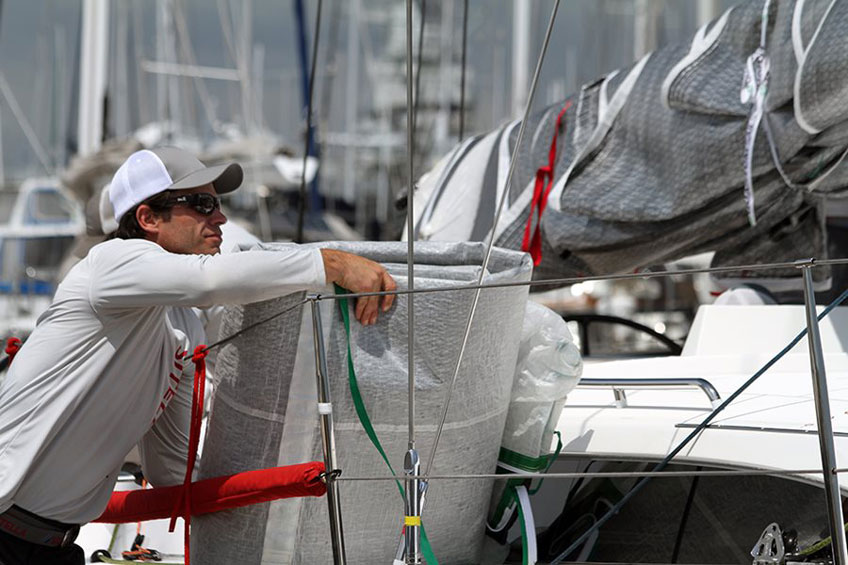
As you get your boat ready to launch this spring, make sure you take a good look at your sails. While this checklist doesn’t replace the need for professional annual sail checks, it will ensure you’re on track to start the season. Many of these are also good to run through mid-season as well or before any major regatta – especially if it’s an offshore event.
CHECK FOR DAMAGE
Mice and other rodents love to make their winter homes in stored sails and use them to build their nests. As soon as your sails come off the shelf, open them up and make sure there aren’t any surprises. Look for chewed holes and excrement. If you did host a family of rodents, your sails will need to be brought in not only for cleaning, but for a thorough inspection for any damage they might have caused.
Mold and mildew are other sneaky forms of damage. These culprits can sneak up on you if the sails were not properly dried before storing or if the storage location was too damp. Not only will you see it, you’ll likely smell it as soon as you open them up. If mold and mildew are present, it is recommended the sail(s) receive a professional inspection and cleaning before they are used.
Don’t forget to check your sail covers and sail bags in this process, too. Look for wear, chafe and holes. Any of these will limit their effectiveness against UV rays or affect their ability to protect your sails in storage or transit. Remember, rinsing your bags after use is important when you’re racing in salt water locations.
If you have questions about proper storing technique, refer to this guide.
INSPECT THE CLOTH AND STITCHING
Sails need to be professionally inspected on a regular basis; however, there is a quick check that you can do yourself.
- CLOTH AND FABRIC: UV degradation and exposure are the most common cause of sail failure and damage in most racing sails, both laminate and woven. However, fatigue from flogging and aggressive use isn’t far behind. Lay the sails out on a clean, cleared area and look for any weak spots. If you can tear any areas by hand, your sail will need attention ASAP. Otherwise, run your hands over both sides of the sail looking and feeling for tears or cracks. Don’t forget to run your fingers along the leech, luff and foot of the sail checking the tape and looking for chafe and wear. Finally, look at each of the grommets and make sure there isn’t any pulling or ripping around them.
- STITCHING: There are a handful of reasons for failed stitching, but regardless of the cause it needs to be addressed. Take a quick look for any large sections of broken stitches on the panels, the edges and the corners. To check for UV damage, scrape your fingernails back and forth a few time on a few sections. If the stitching is shot, it will fail after three or four passes and you’ll need to bring it in to the loft to be assessed. Don’t forget to check your UV cover. This strip of material is meant to be sacrificial and will need to be restitched (if the stitching fails the nail test) or replaced every so often. Weakened stitching is a good indication of a worn UV cover.
- BATTEN POCKETS: Quickly check the fabric around the battens, in particular the area at the inboard ends of leech battens or both ends of full battens. Failed stitching or wear could result in having a batten rip through the sail or fall out.
- CHAFE: Chafing is another common cause of sail damage. Good places to look on your mainsail are around reef points, where the leech overlaps the backstay, and where the sail might come into contact with the spreaders when fully eased. For your headsails, look for chafe points at the spreaders and the foot where it might come into contact with your lifeline stations. The upper and lower ends/sections of the luff tape should be looked at closely as well.
- CORNER ATTACHMENTS AND WEBBING: Inspect the attachments at the corners and the webbing that secures them to the sail. If wear or signs of rust are seen it would be best to have them inspected at the loft.
HARDWARE
Slides and hanks are also common fail points on a sail. If you use hanks, look for thinned metal or strain lines emanating from the attachment points. If you use slides, check the webbing or shackles for chafe or wear. Both the nylon and plastic commonly used for the webbing are also susceptible to UV damage.
This is also a good time to look over your lines and make sure you not only have the number of lines you need, but that they’re in good condition. Faded lines can signal UV damage. Bend them to make sure they’re not brittle and then use your fingernails to scrape the line, similar to how you tested your stitching. If the lines flakes or scrapes away, it’s time for replacement. In addition to checking for UV damage, you’re also looking for chafing and tears.
INVENTORY
This might sound silly, but make sure all of your sails are accounted for. You’d be amazed how common it is to misplace sails and the earlier you realize you’re short one, the better.
After you’re sure your sails are there, consider your plans for the year. Different types of racing call for different sails or adjustments. If you’re planning on doing a lot of offshore racing, you will need a few extra sails in your sail plan. You might also want to consider adding another reef point. If you have a lot of shorthanded events on the docket, looking into a headsail furling system might be a good idea if you don’t already have one. These are great topics to discuss with your sailmaker and address as early in the season as possible so any changes or additions don’t affect your plans.
PREPARE FOR USE
Once you’re happy with the condition of your sails it’s time to pack them, install them, or re-store them so they’re ready to go when you need them.
If they’re not going to be directly installed on the boat, rolling them is always the best choice. If you don’t have the space for that, flake them neatly, looking out for creases. Next, brick the sail by rolling it from luff to leech if it’s a headsail and from leech to luff if it’s a mainsail. Secure it with a sail tie or two.
If your sails stay installed on your boat for the whole season, it is important that you ensure the UV covers or sail covers are working properly. If any sails are stored below deck, invest in a small dehumidifier to keep the moisture levels down to prevent mold and mildew growth.
Being proactive with all of your boat maintenance will help you maximize your time on the water and your performance on the racecourse. Get those sails checked out now and be ready to go on launch day. If you have any questions or concerns, give me or your local loft a call, we’re always happy to help you protect your investment!